Egg Roll in a Bowl

I stumbled on this beautifully easy recipe a few weeks ago, and now I make it entirely too often around here! It is ridiculously easy, and is another healthy one-pot dinner I can rotate through the meal plan fairly regularly without complaint from my "needier" eaters! 

What busy mom doesn't need more of this kind of recipe in her life?

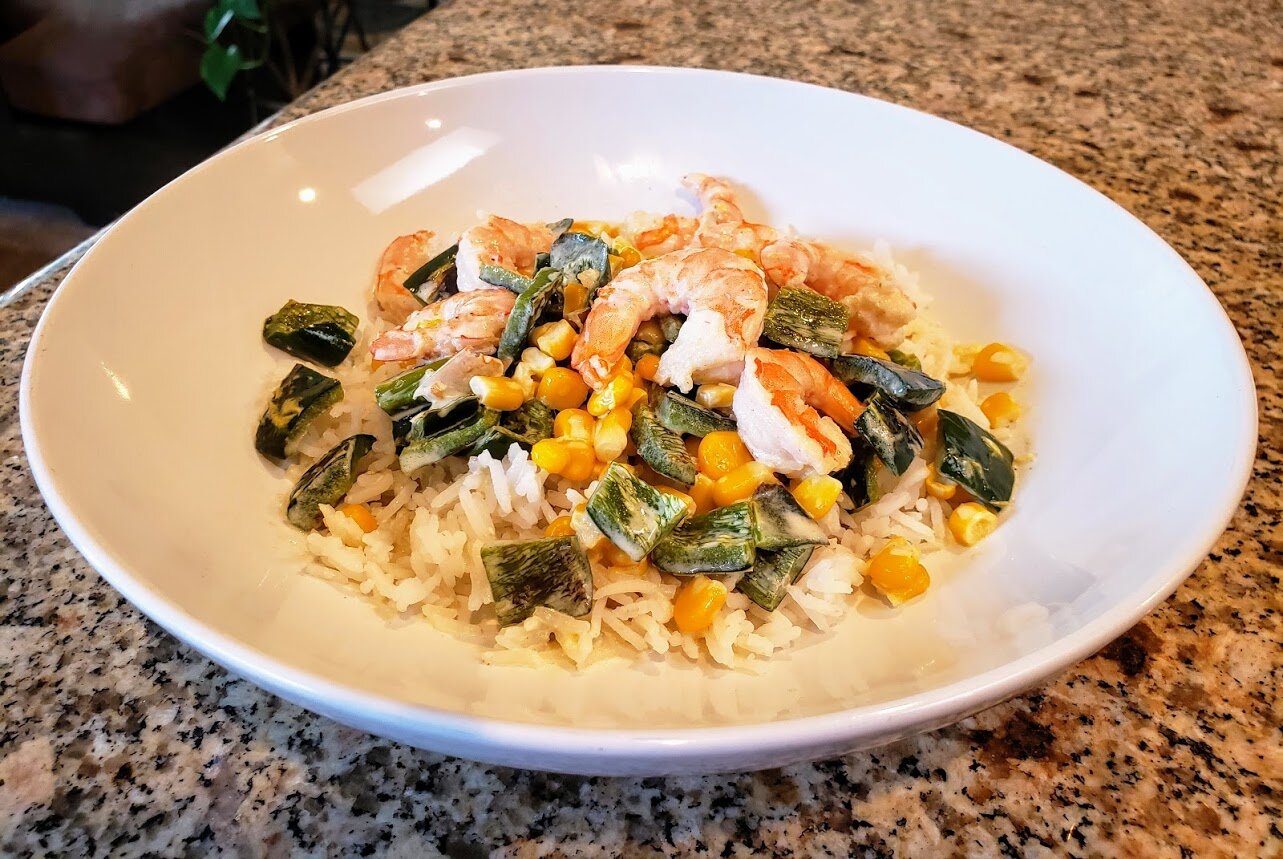
The original recipe I tried called for pork sausage, but since we're trying to move away from pork in our diet, we found that lean ground beef or turkey works just fine as well. I'm also going to try it soon with shrimp as the protein center.

Here's how you make this entirely-too-easy family meal...

Ingredients:

  • 1 package of shredded slaw or veggies (I use the super food shredded mixes)

  • Handful shredded carrots

  • Handful Chopped, rinsed kale

  • 1/2 to 1 lb lean ground meat (your choice, amount to taste)

  • 1 thumbnail-size fresh ginger root, minced or grated

  • 3 fresh garlic cloves, minced

  • drizzle sesame oil

  • drizzle low-sodium soy sauce or liquid aminos

  • sprinkle of crushed red pepper (only if you like a little heat)

  • sprinkle of toasted sesame seeds (for garnish)

egg roll in a bowl prep.jpg

Instructions:

  1. Place a large, deep pan over medium to high heat. Add ground meat and chop it up while it browns. Once browned and almost done (about 4-5 minutes) add in the fresh garlic and ginger.

  2. Add in slaw or shredded veggies, stir occasionally for about 3 minutes or so.

  3. Drizzle both the sesame oil and soy sauce, and add crushed red pepper.

  4. It's DONE! Place in a bowl and top with a sprinkling of sesame seeds if desired.

Here's what I love most as a health coach about this recipe - there's NO need for a fried shell like a traditional egg roll. What I love most about this recipe as a mom? Way less mess, since there's no frying and it only uses one pan!

My family and I are getting a good amount of vitamins, minerals and fiber from this dinner and we're staying on budget! Win-win. 

Here’s a quick how-to video:

Tell us what you think of this recipe in the comments below after you try it with your own hungry loves. For more FRESH recipe makeovers to add into your healthy meal plan, have a look-see in the recipe box here on the site


Pumpkin Pie Smoothie

pumpkin smoothie 1.jpg

I couldn’t believe it when I found out: there are so many nutritional benefits to eating or drinking pumpkin!

Keep in mind, I’m talking about real, whole-food, pumpkin - not a PSL from you-know-where. BUT the fun fact is, this humble squash is a gold-mine of healthy fiber, vitamins, minerals and energy-giving, gut-healing goodness!

Even knowing this, our family has never been huge pumpkin fans ( as I know many of you are - YAY!)

So finding this recipe about 10 years ago (and as usual, making a few of our own simple tweaks to perfect it for us) helped us add in this nutritional powerhouse in a more realistic, family-friendly way!

It’s always fun to make during the holidays, of course (traditions and all that) but this delicious, easy smoothie is an smart meal any day of the year! And with the convenience of 100% pure canned pumpkin available year-round, it’s simple to do.

Scroll down after the recipe to see what pumpkin can do nutritionally for your body and health…but for now…

Here’s how to make it:

Pumpkin Pie Smoothie

Ingredients

3/4 cup Pumpkin Puree (canned is fine… Just check to make sure it’s 100% pure pumpkin!)

1 frozen or fresh banana

1 cup Almond Milk (or any other plant or nut milk)

2 tsp Pure Maple Syrup (or more, to taste)

1/2 tsp Pure Vanilla Extract

Sprinkle: cinnamon, pumpkin pie spice

1/2 cup Ice

Optional: 1 Tbsp Ground flaxseed or Chia Seeds

We don’t always include the seeds on this particular smoothie, only because pumpkin is already a mild diuretic - and that goes both ways. If you need to go, it’ll help you go, if you need to stop going, it’ll help with that, too!

Instructions

Blend all ingredients together in a blender or bullet for about 2 minutes or until desired smoothness.

Fun tip: We like to squirt a bit of canned whipped cream on ours, and sprinkle a dash of cinnamon on top for that luxurious visual and taste appeal!

Tip: For room temp smoothie (many prefer this in the colder months) just use room temp banana and no or less ice. For that frozen goodness some of us crave all year long, add that frozen banana and a handful of ice.

pumpkin smoothie 2.jpg

After you try this bright orange yumminess at home, be sure and post your pics on our Facebook page FRESH Start for Health!

What pumpkin brings your health…

Vitamins and Minerals:

  • Vitamin K: 49% of the RDI

  • Vitamin C: 19% of the RDI

  • Potassium: 16% of the RDI

  • Copper, manganese and riboflavin: 11% of the RDI

  • Vitamin E: 10% of the RDI

  • Iron: 8% of the RDI

  • Folate: 6% of the RDI

  • Niacin, pantothenic acid, vitamin B6 and thiamin: 5% of the RDI

RDI = Recommended Dietary Intake

This is a fantastic amount of the necessary nutrients your body needs everyday!

Pumpkin is nutrient-dense - lots of nutrition, little bit of calorie load. And it also delivers high fiber (the kind that your body can use to the max - helping your gut heal itself and remove harmful waste!)

It’s high in beta-carotene, a VERY useful antioxidant that we often don’t get enough of. Beta-carotene actively helps our body fight off infection and disease, including viruses, bacterial infections, cancer, diabetes and heart disease!

There’s so much more goodness in this food-jewel than what I can put here. Just promise me you’ll try this smoothie, even if, like me, you haven’t really been a big pumpkin lover before now.

I believe you’ll find yourself going in for that next sip, as surprised as I was, to really like it!

pumpkin smoothie 3.jpg

Creamy Shrimp and Poblano Dinner

One of the classic dinners that has been in our family-recipe-rolodex for years now is the Creamy Shrimp and Poblano Dinner!

Mainly, because it’s so few ingredients and quick and easy to make. But also because our Mexican daddy loves the Baja-freshness of this dish.

It’s also naturally Gluten-free without missing anything tasty or robust. And it’s super easy to make this recipe dairy-free by swapping the cream for rich Coconut milk! Gives it a great taste, too!

See what I mean by easy-to-make here:

Creamy Shrimp and Poblano Dinner

Ingredients

  • 1 1/2 pounds Peeled and Deveined Shrimp, medium size (I use cooked)

  • 1 Tbsp Olive Oil

  • 2 good-sized or 3 small Poblano Peppers, cored/seeded and cut into 1/2 inch chunks

  • 1 cup Frozen Sweet Corn

  • 3/4 cup Heavy Cream (or Coconut Milk for dairy-free)

  • Freshly ground Pink Salt and Black Pepper

  • Optional: Cooked rice to serve it over

shrimp poblano cream dish ingredients.jpg

Instructions

Heat the olive oil up in a large fry pan over medium heat. Once hot, add the poblano pepper chunks.

shrimp poblano cream dish how to make it pic 11.jpg
shrimp poblano cream dish how to make it pic 10.jpg
shrimp poblano cream dish how to make it pic 8.jpg

Next, saute the peppers for about 5 to 6 minutes, or until they soften and blister a bit.

Now, add in the corn and seasonings. Stir and simmer for about 3 minutes, or until the corn is cooked.

Then, add in the shrimp and cream, stirring and heating for a couple minutes, just until hot.

shrimp poblano cream dish how to make it pic 4.jpg

Serve your delicious, easy-peasy dinner over rice and you have a complete meal!

Tell us what you think of this one - will it make into your family’s regular meal plan, too?

You’re welcome to post finished recipe pics on our FRESH Start for Health Facebook page anytime!

FRESH Tuscan Salmon

Always on the search for yummy, but Gluten-free, new dinner ideas for this hungry family of mine, we found a FRESH way to make this delicious salmon dish.

We made a few tweaks to the recipes we found online and ended up here: enjoying this SUPER easy & affordable version of the classic restaurant-fancy dish with just a few tasty ingredients!

Even the newest or shyest home cook can make this FRESH dish - try it with me!

Here’s how to make…

finished salmon edited.jpg

FRESH Tuscan Salmon

Ingredients

  • 2 Tbsp Extra-Virgin Olive Oil

  • 4 - 2 ounce Salmon Fillets (skin on and patted dry with paper towel)

  • Kosher or Pink salt

  • Freshly ground black pepper

  • 3 Tbsp Unsalted Butter

  • 4-5 Cloves Garlic, Finely Minced

  • 2 Handfuls FRESH Cherry Tomatoes (any type), Halved

  • 3 Handfuls FRESH Baby Spinach

  • 1/2 C. Heavy Cream

  • 1/4 C. Freshly Grated Parmesan Cheese

  • Handful Chopped Herbs (such as basil and parsley) plus more for garnish

Instructions

Lay out all ingredients first: grate the cheese, mince the garlic, halve the tomatoes, slice and pat the salmon down and generously salt and pepper it on all sides - just to have everything ready before you start cooking.

Using a large frying pan, set the heat to high. Drizzle a good amount (1 to 2 Tbsp) of Olive Oil into the pan and allow it to get hot, then turn the heat down to medium. Then, using pinchers, lay the salmon filets carefully into the hot oil, skin down.

Cook the salmon for about 5-6 minutes on that side, then turn over and cook for another 2 minutes on the other side. Keep turning the filets and cooking for 1-2 minutes, or until all 4 sides are crispy.

Remove the salmon filets and put them on a plate covered in paper towels. Let them rest while you move on to the sauce.

fresh tuscan salmon pic 2.jpg

Keeping the oil from the salmon in the pan, raise the heat again for a minute, placing the 3 Tbsp unsalted butter into the pan and let it melt, then lower the heat to medium again. Add in the minced garlic and cook for about 2 minutes, stirring a bit.

Add in the halved cherry tomatoes, and let them cook on medium heat for a few minutes - until they begin to soften, or as soon as the skin starts to blister.

Keeping the pan on medium heat, pour in the cream. Drop in the spinach and parmesan cheese, and stir it all as it comes to a simmer. Simmer on low-medium for about 2-3 minutes.

tuscan salmon sauce pic 1.jpg

Add the salmon filets back into the sauce, and scoop some of it over the filets to completely cover them in this luscious sauce!

Sprinkle the FRESH herbs over it, and put on the lid, letting the whole dish simmer together on low-medium heat for about 3 final minutes.

Serve over rice, or pasta, or next to a FRESH salad.

salmon in sauce.jpg

We ate so happy with this new dinner idea - and it is wonderful to know it’s completely Gluten-free and safe to enjoy for us all!

We all agreed that this dish will make our family favorites list and now be a regular feature in the “again, please” recipe choices for dinners around here!

I want to know - will you try this one?

Post your finished pics with your approval of this FRESH new recipe on our Facebook page @ FRESH Start for Health!

Oven Roasted Broccolini Recipe

Looking to try an easy, delish new vegetable side dish with dinner tonight?

I’ve got a yummy idea for you: Oven Roasted Broccolini!  

broccolini finished.jpg

I’m sharing this one with you to simplify your family’s dinner tonight.

It’s hard enough to follow a clean eating lifestyle these days, trying to think of healthy sides, night after night. So this one is about way more than the tasty side dish, created with very little effort.

(Though the fact that this recipe takes only 15 minutes is a fun plus!) 

It’s that this shiny green veggie is so dang good for us!

The nutritional benefits of Broccolini are numerous, with it ranking high for both Vitamins C & A (both of which are super important for strengthening our immune system, helping our bodies in fighting off both virus-caused sickness and the common cold!) So important that we’re intentionally eating for immunity! Now, more than ever.

Oh and hey, did you know that getting enough Vitamin C through your foods is a great way to boost your body’s absorption of iron? (No? Ok, to be real, I didn’t either until I was researching for this post!) This is a really beneficial thing for all of us, but especially for those of us eating plant-based - as we’re possibly getting less iron into our bodies!

Here’s how to easily make it...

Oven Roasted Broccolini

Take 1 Bunch Broccolini (per 2-3 eaters) and wash, shake off water, and trim off about an inch from the end of the stalks.

Set the oven to 425 degrees and prepare a large cookie pan by lining with aluminum foil for easy cleanup.

broccolini on pan.jpg

Lay the Broccolini stalks around the pan, then drizzle generously with olive oil (may use your hands to mix the oil evenly into stalks) and grind fresh black pepper and pink salt over it.

Bake for around 10-15 minutes, or until crispy and browning on edges.


This is the “base recipe,” but you can always change it up, and add one of these fun variations on flavor:

  • 2 Tablespoons grated Parmesan cheese

  • Squeeze a half to whole fresh lemon over the Broccolini (to taste)

  • Mince 3-4 fresh cloves of garlic and sprinkle over it before baking

  • 1 Sprinkle of preferred Chili powder, chili flakes, or small smear of chili paste mixed in well

  • Sprinkle handful shredded sharp cheddar cheese over it in final 3-5 minutes of baking

Well, are you inspired to try this easy, peasy recipe for dinner this week?

Looking for more recipes and ideas for clean, healthy living for your busy family? Join the conversation in our community!

Easy Carrot Salad

Carrots have numerous nutritional benefits, as they are packed full of sugar-balancing through researching ways to balance blood sugar through diet and naturally reverse autoimmune disorders…I’m learning even more about the incredible benefits they are full of!

  • Because of the complex carbs and type of fiber they contain, they help our bodies balance our blood sugar - especially when enjoyed raw, like in this recipe.

  • They are full of beta-carotene (the vitamin that gives them their gorgeous color) AND alpha-carotene, and we need these 2 antioxidant-rich substances to help our body make vitamin A for healthy skin and mucus membranes, boost our immune system, and give us good eye health and vision.

  • The antioxidant load in carrots is high, and a necessary nutrient our body needs to help itself remove free radicals and unstable molecules, two of the “oxidants” that contribute to cancer, inflammation and compromised immunity. Carrots literally help our body “flush” them out!

I won’t bore you with more details on the power of these amazing root veggies - but hopefully you’ll get to making this delicious recipe to bump up your carrot intake.

Your body will thank you!

carrot salad final.jpg

Ingredients

  • 1 - 10 oz. bag shredded carrots

  • 1/3 cup raisins, dried cranberries or golden raisins

  • 1/2 cup medium-diced fresh pineapple (or canned, if you don’t have fresh)

  • 1/2 cup walnuts, chopped into small chunks

Sauce:

  • 1/2 cup unsweetened almond milk

  • 1/4 cup mayo

  • 1 teaspoon (packet) of Stevia or a drizzle of pure maple syrup

    (Choose your sweetener based on your personal nutritional needs.)

carrot salad ingredients.jpg

Instructions

For the salad:
Stir together the shredded carrots, raisins, diced pineapple, and walnut pieces into a bowl. Set aside.

Mix up the sauce ingredients in a separate container, using a whisk to blend well. Pour the creamy concoction over the bowl with the carrots, raisins, pineapple and walnuts.

Refrigerate for at least 2 hours, or overnight for best taste and blending of all the flavors.

Makes a wonderful, light, FRESH side dish for grilled chicken or fish.

Let me know what you think - did you make this? Chat with me on our Community page on Facebook about carrots, this recipe or any FRESH topic!

I’d love to know how the recipes and tips I share are helping your family enjoy fresh, homemade food!

Homemade Chipotle Bowl

This recipe is so versatile! 

Design your own bowl to your taste and eating plan. Make a plant-protein-rich version by eliminating the meat and shredded cheese and generously adding the beans and even some fresh slices of avocado! OR use any other meat protein you'd like with this recipe. Grilled chicken, Adobe pork, shredded chicken, or even ground meat.

chipotle bowl FINAL.jpg

This post will take you through the different dishes I make to create our favorite bowl dinner, the Barbacoa & Beans bowl.

Cooking this entire meal at once could be overwhelming to a new cook..

so please know that you could try just one of the included recipes to start, or prep some of the dishes ahead of time to make it easier.

For instance, I make the pico and slice the peppers and onions ahead of time! I often cook the beans in the slow cooker during the day, and the rice in a rice cooker, so that we only have assembly to do later in the day. One tip is to store the pico and peppers/onions mix in glass containers in the fridge - they’ll retain their crunchiness and fresh taste better!

The different recipes in this post, complete with how-to’s & hacks, are:

  • Ranchero Beans

  • FRESH Pico de Gallo

  • Barbacoa (flavored shredded beef)

  • Fajita Veggies

  • Cilantro-Lime Rice (just like Chipotle’s!)


How to Make Easy Ranchero Beans:

Canned pinto beans, rinsed in a strainer, (use 1 can per 2-3 people)

2-3 cups chicken broth 

¼ sweet onion (thrown in whole if you want to remove it after cooking, or sliced to eat)

Either 2 pcs bacon, chopped or ¼ pound ground sausage, cooked

2 smashed cloves fresh garlic or 1 Tsp garlic powder

1 Tsp onion powder

½ tsp sea salt

Optional: Half Jalapeno for heat

In a medium saucepan, bring all ingredients to a soft boil, then turn heat to low simmer, and cook for at least 30 minutes.

OR keep it even easier, and place all ingredients in a slow-cooker and leave it on low for 4-6 hours.

ranchero+beans.jpg


Fresh Pico - this is an essential part of the meal, in my opinion, as it adds a FRESH and crunchy taste and texture to any bowl you create! Link to my Pico De Gallo recipe HERE!

Storebought Barbacoa.jpg

Barbacoa You can make it yourself in the Slow Cooker with this easy recipe HERE. OR you can just get it store-bought and use that for your bowl. My favorite brand to use when I can’t make it homemade is pictured.

Fajita veggies - This is another necessary dish to include, in my opinion - again, because of the natural, crunchy, delicious FLAVOR!

Here’s how to make them:

  1. Slice 2 colorful bell peppers for a sweet, mild flavor or you can use Poblano (also called Ancho Chile peppers) Just know they are definitely going to lend some heat to your fajita veggie mix! Choose your colors/types of peppers by your preferred taste or just to use what you have on hand.

  2. Add a FULL sweet or red onion, sliced. (Just use 1/2 of one if they are large.)

  3. Drizzle olive oil into large frying pan over medium heat, and add in the peppers and onions once the first slice sizzles in the hot oil.

  4. Saute the colorful, fragrant mixture over medium to high heat for about 5-8 minutes (or until desired texture) stirring only a couple times. If you prefer crunchier veggies, saute until 6 minutes, tops. If you like a more caramelized finish, cook 8-10 minutes and only stir them a couple times.


    You’ll end up with these beauties…

fajita veggies.jpg

Cilantro-Lime Rice

Cook your choice of rice to your taste, using a rice cooker or a saucepan. 

Per 2 cups of cooked rice, chop ½ bunch fresh cilantro and stir in with 1-2 limes, squeezed (depends on your taste and how zesty you prefer it)

Stir in a sprinkle of Himalayan or Sea salt, and let sit for a few minutes.

Serve to your happy eaters!

My tip for the fluffiest rice ever!

Take 1 cup dry Mahatma Basmati (I use white OR brown, depending on your taste) and 1 ¾ cups water and soak them together in a medium saucepan for 15 minutes. (No heat yet.) When 15 minutes is up, put heat on high and bring the mixture to a boil, then lower heat to lowest temp and simmer rice, covered, for 10 minutes.

Remove rice from heat, bring to almost room temp. Roughly chop a large handful of fresh cilantro and sprinkle into the room temp rice. Squeeze 2-3 limes into the rice, stir all ingredients together. Serve immediately. 

Other add-ins you may like for your bowl:

  • Lettuce or other bed of greens (we prefer romaine with this recipe!)

  • Shredded cheese

  • Sweet Corn relish or roasted sweet corn kernels

  • Sour cream

  • Guacamole or avocado slices

Once you have all the ingredients you want to add to your Homemade Chipotle Bowl, you can lay them out to let each person assemble to their taste!

finished+Chipotle+bowl+ingredients+on+counter.jpg

You may also like to serve with a dressing of some kind - ranch or a vinaigrette - we tend to eat it without, just because there’s already so much flavor in this meal!

Can’t wait to hear what you think once you’ve tried your hand at this dinner!

It’s not one of the easiest I’ve shared with you, but SO delicious and filling - and plenty leftover to eat or make differently the next day. (Cook tonight, take next night or 2 off!) Cook extra, and you can easily turn the leftovers into a burrito, taco salad, or other dinner!

What do you think? Tell us and post pics on our Community page on Facebook HERE.

Fresh Pico De Gallo

Salsa!

These chunky, fresh mixes of healthy vegetables (and sometimes fruit!) are a family favorite around our house, and a no-fail side dish to “spice up” or freshen up any main course!

The first one is an old standby that my family and I never get tired of - my version of Pico de Gallo. A great way to get the kids to eat a serving or two of fresh veggies, and not even realize it! We eat our Pico with multi-grain chips, seed crackers, over fish or meat, in tacos, on salads, or even as a Bruschetta over bread.

Here's how you can make delicious Pico de gallo:

Fresh Pico de Gallo de bess

fresh pico.jpg
  1. Use 4 ripe (make sure they’re really hard!) tomatoes, 1/2 sweet or red onion, 2 limes and a handful of cilantro.

    2. Chop each ingredient, as fine or chunky as you prefer. Squeeze the limes into the mix, and stir it all together in a mixing bowl. Sprinkle sea salt or even a bit of garlic salt, and stir again.

  2. Chill for an hour or two before serving for best taste. You can store for a full day or two in fridge - it only gets better as it sits!

Optional add-ins (get creative and make it to YOUR taste!)

  • Avocado (make sure it’s ripe and firm!)

  • Black beans

  • Jalapeno or another spicy pepper

  • Lemons (some people prefer the taste of lemons to limes and I use it as a swap if that’s what I have on hand!)

  • Parsley instead of cilantro (esp for those who taste soap when eating cilantro)

  • Green onion or chives

  • Cucumbers, deseeded

  • Radishes

Just use the basic Pico salsa recipe as a base, and get creative adding your fave ingredients to the mix! 

BONUS: How to make Tropical Pico

The next salsa is a fruity turn on the original, just dice a firm mango into the original mix, and stir it all together.

Or, add in a bit of minced Jicama for a special tropical crunch! Get as creative as you want, by adding in YOUR fave fruits. 

There you go! 

This tropical pico tops grilled fish and chicken deliciously, or spooned into a fish or shrimp taco, it’s TASTY! It’s an easy to make, everybody’s favorite, fiber-filled side dish!

Get imaginative, get dicing, and get healthy in this fresh way! 

What are some of your favorite salsa combos? 

Post your ideas, and pics of your own simple salsa creations on our community Facebook page!  We want to see your recipe ideas…get ready, get set, post!

Protein Energy Bites Snack Recipe

This no-bake, Protein Energy Bites Snack Recipe is just the fix when you need a quick dose of natural energy!

...without a too-much-sugar-penalty to your FRESH eating plan!

It's a go-to favorite in our house for a quick power snack that also satisfies a sweet tooth!

Since it’s made of all 3 vital food groups: protein, fiber, and healthy fats - it is truly a “power combo” food.

These bites are chewy and just barely sweet, but not too much - hubby Juan is the official Protein Energy Bites maker in our house, and he has truly perfected this recipe over the years.

protein bites bowl 3.jpg

These bites are “no bakes”… just one reason why we love this delicious recipe!

It's a flexible recipe, too - if you end up omitting one of the dry ingredients (such as coconut or ground flaxseed) just add in some "extra" of any other dry ingredient is remaining in the recipe (for example, the oats.) If you feel like they come out too dry, add in a drizzle of extra honey or peanut butter. Although it’s also not required to refrigerate this dough, it helps the balls stick together much better. We think they are also tastier if they are a bit chilled!

Protein Energy Bites Snack Recipe

Ingredients

  • 2 cups (dry) old-fashioned oatmeal

  • 1/3 cup unsweetened coconut flakes (to satisfy a sweet tooth, use sweetened)

  • 3/4 cup peanut butter or almond butter (or any other nut butter of your choice)

  • 1/2 cup ground flaxseed

  • swirl of raw honey (about 1/4 cup if you prefer to measure)

  • 1/2 cup pure maple syrup

  • 1 tsp vanilla extract

  • 1 Tablespoon Coconut Oil

  • 1/3 cup MINI chocolate chips (optional)

  • Optional add-ins: sliced or slivered almonds, craisins, raisins, pepitas/pumpkin seeds, sunflower seeds, chia seeds, hemp seeds

    NOTE: anytime you add in more dry ingredients, you need to add a bit of the wet ones, like coconut oil, nut butter or maple syrup to even it out and keep them moldable.

Instructions

  1. Stir all ingredients together in a medium bowl until thoroughly mixed. (You can use disposable gloves, rub a bit of coconut oil on them, so that forming the bites into firm balls is easier.)

  2. Store in a glass container (preferred) or gallon Ziploc or airtight container. You can keep refrigerated for up to 1 week.

  3. Makes about 20 ball-like bites.


Another way to make forming the bites easier: Cover and let the mixture chill in the refrigerator for half an hour before trying to form the ball-like bites. Once chilled, roll into balls of whatever size you would like. (Mine were about 1 1/2" in diameter, to keep portions in check.)

Another Tip: I would caution against substituting agave nectar for the honey, as the honey’s thickness helps hold things together, and as most of you know, I don’t much appreciate agave nectar LOL!

protein bites bowl 2.jpg

After you make these, let us know…

did we hit a home run for a healthier energy-giving sweet snack?

Mexican Spicy Slow Cooker Shredded Beef

Authentic Mexican food is a favorite around my house, as that is the culinary culture of my husband Juan, who was born and raised in Mexico. 

He integrated his rich culture (including amazing food) into our family, and we love it! Over the past few years, I’ve worked to learn and apply the unique taste of his mom’s (mi Suegra) cooking, making sure to keep the delicious qualities of real Mexican food in it at the same time. (This Norwegian/American cook has come a long way though, and I’m thankful for the flavor influences of my Mexican family!)

This dish happens around once a month around here, as the lean protein is a great base for several of our favorite dishes - you can make many flavorful, easy family favorites from this one crock pot wonder! Taco salad with shredded beef, shredded beef tacos and burritos, and even Homemade Chipotle bowls!

Often, we turn the beef into the traditional “Barbacoa” or “Birria” just by changing up some flavorings at the end by adding in a beer and spices, along with a secret sauce!


Mexican Spicy Slow Cooker Shredded Beef

Here’s how to make delicious shredded beef...

Ingredients:

  • 3 lb beef rump, tip, or round roast

  • 1 sweet onion, chopped in half

  • 1 medium tomato, cut in half

  • 3 cups beef broth (OR 2 cups + add a small beer if you’d like more tenderizing and taste)

  • Optional - 1/3 cup red wine vinegar, but drop this if you add the beer

  • 5 raw garlic cloves, smashed

  • 2-3 bay leaves

  • 6-8 whole peppercorns (optional - adds a peppery spicy flavor)

  • 2 Tsp oregano

  • 2-3 shakes of red chili flakes or 2 dried chile de arbol

  • 1 Tsp chili powder

  • 1-2 chipotle peppers, canned in adobo sauce (optional - this is if you want a Barbacoa flavor!)

Instructions:

  1. Place the beef in the slow cooker with all the above ingredients except the chipotle peppers, and set crock pot on low for 6-8 hours, or longer to desired tenderness.

  2. After meat shreds easily with 2 forks, use a strainer spoon to carefully remove all the remaining tomato, onion, bay leaves and garlic cloves. Shred the meat, crisscrossing 2 forks together, straight into the broth inside the slow cooker. It’s ready to drain and serve in tacos or burritos, or serve it juicy, in a bowl!

  3. (For Barbacoa flavor - do this optional step) Right before serving the meat, make a paste out of the chipotles by blending them in a blender with 1/4 cup water, then straining the seeds and casing out of the mixture. Add the paste into the slow cooker during the last 1-2 hours of cooking.

Enjoy one of my own family favorites, and be sure to let me know what you think in the comments below after you’ve made this easy recipe!

Sweet Corn Chowder

I created a brand new recipe tonight - and I just want you to know - this never happens!

The whole family loved it.

FIRST SHOT.

Usually, I have to try at least a couple times to tweak and change and improve a brand new recipe (especially one I invent in my head) …but not tonight!

It’s a creamy chowder, somewhat sweet, but with a smokey, savory twist.

Sweet corn chowder, made completely from scratch, and off of warm childhood memories of growing up on a sweet corn farm in rural Illinois.

But enough about me, my childhood, blah blah blah - let’s get to the soup. (haha)

Why don’t you just try it, then tell me what you think?

sweetcornchowder.jpg

Here’s how to make it:

Ingredients

  • 2 potatoes, peeled, and cubed (I used russet, you can use any kind)

  • 6-8 ounces frozen sweet corn

  • 1 cup diced thick ham (I used leftover whole ham roast from the freezer)

  • 4-6 cups beef broth

  • 1-2 Tablespoons olive oil or butter (to saute onions and garlic)

  • 1-2 Tablespoons gluten-free flour (I use Krusteaz)

  • 1/2 sweet onion, finely diced

  • 4-6 fresh garlic cloves, smashed

  • 1 - 1.5 cup heavy cream OR half and half

  • Salt, Cracked Pepper, Onion Powder to taste

    Garnish:

  • 4 slices bacon, crisped and crumbled (I get the no-nitrate bacon at Costco)

  • 3 green onions, diced

Instructions

  1. Prepare the potatoes (peel and dice), as well as the diced onions and mashed garlic cloves. Put a soup pot on medium heat and place the oil or butter in it. As it melts, stir in the diced onions and mashed garlic cloves. Saute them for 5 minutes or so.

  2. Drizzle a bit more oil or butter into the onion and garlic mixture, and as it heats, stir in the flour to begin making the rue. Stir briskly for one minute, then start slowly pouring in the beef broth, little by little, whisking the rue into it as you do - this will avoid clumping and produce a smooth soup.

  3. Once the beef broth and rue are smoothly combined, add in the potato cubes and bring to a boil over high heat. Bring heat back down to simmer the broth and potatoes for about 10-12 minutes, or until potatoes are just barely cooked through.

  4. Add the ham pieces, sweet corn, seasonings and cream, and cook the soup on high simmer for another 3-5 minutes. Turn off the heat. (Tip: using heavy cream is obviously higher calorie/unhealthy fat than the half and half - however, it will create a thicker soup.)

  5. Serve the soup piping hot with a crumble of crispy bacon and sprinkle of green onions over the top.

    YUMMY!

    Well, what do you think? Easy enough?

Can’t wait to see what your family thinks of this easy, cozy, comforting one-pot dinner.

Let me know in the comments below or join us for our weekly discussions in the FRESH Start Club! We like to eat around here, enjoying many different kinds of foods from all the food groups - but of course in moderation and adding in FRESH whenever we can!)

From my kitchen to yours…

Happy FRESH eating ~ Coach Bess

Easy Chicken Parmesan & Spinach Bake (Gluten-Free)

Aahhh Chicken Parmesan - always a delicious family favorite.

There’s a classic version of this recipe right here in our Recipe Box, but I knew I needed to revamp it to 100% Gluten free for my recent eating restriction. (More on this story to come, as I don’t want to confuse anyone, since we teach and believe in FRESH foods and non-restrictive living around here!)

However, to truly battle the autoimmune disease that I have, I have found that eating gluten free is healing me, so I do it! And remaking this recipe (along with many other favorites!) to still be tasty and satisfying was my personal challenge. And after some tweaking and trying, I did it!

THE. WHOLE. FAMILY. APPROVED.

You guys, that’s like Christmas to this health coach mama!

I present to you the Gluten Free version of the Classic Coach Bess Chicken Parmesan & Spinach Bake!

GlutenfreeChickenParmFINAL.jpg

Here’s how to make it:

Ingredients

  • Boneless, Skinless Chicken Breast Cutlets (or full breasts, sliced into thinner pieces)

  • Homemade Marinara sauce OR store bought is fine, in a pinch!

  • FRESH Spinach leaves ( I get the carton of them, they seem to stay fresh longer in those)

  • Mozzarella Cheese, Shredded (I used about 1/2 cup for my whole recipe to keep dairy minimal - and it was DELISH!)

  • Olive or other cooking oil (I use probably 2-3 Tablespoons - method explained below!)

  • 1/2 cup Almond Milk, unsweetened to dip chicken in before breading

  • Gluten-free Angel Hair pasta (or any other “healthy” pasta you prefer)

For Breading:

  • Gluten-free Italian Breadcrumbs (my fave type is pictured)

  • Gluten-free Panko

  • Gluten-free Flour (I prefer Krusteaz brand because it’s not gummy)

GlutenfreeChickenParmSupplies3.jpg
GlutenfreeChickenParmSupplies.jpg

Instructions

  1. Stir together equal parts flour, panko, and breadcrumbs to create a dense, delicious breading. Place in a wide, shallow bowl to use for dipping the chicken in.

  2. Put the almond milk in a second bowl, and get the chicken ready for dipping.

  3. Prepare a 9x13 baking dish by lining the baking sheet with aluminum foil, or spray with an oil spray, and preheat the oven to 400 degrees.

  4. Place a large fry pan on medium to high heat, and drizzle the small amount of oil on it. While it’s heating up, begin to dredge the chicken pieces in the milk first, soaking them really well. Then dredge the soaked chicken in the breading, making sure to coat evenly with the crumbs.

  5. Brown/crisp cutlets for 3 minutes or so on each side, then pull then out and bake them for a few minutes on a lined cookie sheet to finish the cooking if they are not cooked through. (This is how I use so little oil in this recipe!)

  6. Pour 1/2 cup marinara sauce into bottom of the pan, then layer the spinach over it. Layer the fully-cooked chicken cutlets over the spinach. Sprinkle the half cup of shredded mozzarella over the top, and baked, uncovered, for about 15-20 minutes (keep an eye on it, each oven is different with time and heat intensity!)

  7. Remove the Bake and let it set on the counter about 10 minutes. This is when you can cook the noodles, as they only take about 7-8 minutes for al dente.

  8. Serve immediately over pasta, enjoy!

GlutenfreeChickenParm4.jpg

Quickly frying the chicken cutlets over medium to high heat to brown them!

GlutenfreeChickenParm3CROPPED.jpg
GlutenfreeChickenParm2CROPPED.jpg
GlutenfreeChickenParm1cropped.jpg

Assembling the Chicken Parmesan & Spinach BAKE…

GlutenfreeChickenParminPancropped.jpg

Finished product! MMMM!

I’d love to hear what you think of this one - it’s easy to make “regular” as well. Just use your favorite breading, pasta and sauce and add in the yummy green of the spinach (even my picky eaters eat this one!)

Be sure to join us in the FRESH Start Club (our free hangout online!) where we chat about all things deliciously healthy and FRESH!

Don’t forget to comment below with your take on this delish recipe!

Gluten-Free Banana Nut Muffins (How to Make Them!)

Everybody loves Banana Nut Muffins!

So when I knew I had to go Gluten-free in my foods to help fight my autoimmune disease, I knew I had to test, test, test until I found a Gluten-free flour to keep making my famous Banana Nut Muffins - and keep them deliciously moist and fluffy!

And I found it!

I use Krusteaz Gluten-free flour blend (see pic below) and kept mostly to my original 25+ year banana nut muffin (or bread) recipe to make them.

(Scroll all the way down the post for pics and how-to video!)

Here’s how to make this family favorite:

glutenfreebananamuffins.jpg

Ingredients

1 cup gluten-free flour (I use Krusteaz brand from the grocery store)

1 tsp baking soda

½ tsp salt

½ cup (or 1 stick) unsalted butter, softened

2 eggs, room temperature  

⅓ cup organic sugar (or sugar replacement if you prefer)

½ tsp pure vanilla extract

3 semi-ripe bananas, mashed well (I like to hand-mash them!)

½ cup walnuts, chopped

½ cup mini chocolate chips (optional)

Instructions

  1. Stir together flour, soda and salt in medium bowl, set aside.

  2. Whisk eggs and vanilla in a small bowl, set aside.

  3. Prepare the muffin pan with oil spray or disposable muffin cups while the oven is pre-heating to 350 degrees. 

  4. In another medium bowl, mash the bananas well, then set them aside.

  5. Stir the butter and sugar together until light and fluffy, then set aside.

  6. Combine the egg mix with the sugar and butter mixture, and stir together. Add the bananas, stir. Finally, add the flour mixture a little at a time and stir it all together. 

  7. Place the mixture evenly in the muffin pan, then bake it at 350 degrees for about 20-25 minutes, or until they are done. (When a knife inserted in the middle of a muffin comes out clean, they are done.)

HELPFUL TIPS from video:

  • To soften the butter, pull it out of fridge the night before, or couple hours previous to baking and leave on counter OR heat slightly for a few seconds in the microwave.

  • To bring the eggs to room temp, either pull them out the night before, or couple hours previous to baking and leave in a bowl on counter. Or, for a quick tip: place them in a bowl of slightly warm water, after 20 minutes or so, remove them, they should be room temp.

  • It is important to stir the flour in LAST (after combining the wet ingredients) by spooning just a bit at a time, and stirring it into the batter. It keeps the batter from getting lumpy. Also, don’t over stir the batter, only until ingredients are combined. It will toughen the batter if over stirred.

  • Use mini-chocolate chips instead of regular and only use about 1/3 cup in one batch! It adds a fun stir in for the kids, without adding too much sugar to recipe!


    Enjoy this guilt-free, nutrient-rich treat with your morning coffee or an afternoon cup of tea!


quick video on how to make them:

NOTE! The recipe I’m making in the video is a DOUBLE BATCH! (In case I confuse you with the amounts I talk about!)

 
banana nut muffins in oven.jpg
 
 
The Gluten-free flour that keeps my muffins fluffy, moist and delicious!

The Gluten-free flour that keeps my muffins fluffy, moist and delicious!

What do you think of this recipe? I’d love to know how it turns out for you - especially if you’ve been looking for a Gluten-free flour that keeps your baked goods deliciously moist and fluffy!

Comment here or join the Eat FRESH discussion in our FRESH Start Club (it’s free!)

Zuppa Toscana Soup {FRESH Start Style!}

This comforting pot of fresh-food goodness is always a great dinner idea, but especially on a cold night.

It just warms your insides in the tastiest way! 

Although this recipe was originally a copycat for the soup at Olive Garden, I've changed a few key things in our recipe. We like LOTS of garlic, so we use about 10 cloves in ours. We also like a thicker cream soup, so I use more cream and less potatoes. The kale is also a preference over spinach from the original recipe at the restaurant.

Zuppa+Toscana+Copycat+recipe.jpg

Ingredients 

  • 4 strips low-sodium bacon

  • ½ pound spicy ground sausage (for less spicy soup, mix mild and spicy or just use mild sausage)

  • 4 cups low-sodium chicken broth

  • 2 cups water

  • 2 large potatoes, peeled, quartered and sliced 

  • 1 medium sweet onion, diced 

  • Full garlic bulb, peeled and minced fine

  • 1 ½ cups whipping cream (for lighter soup, substitute half and half or for dairy-free, use coconut milk)

  • ½ bunch of fresh Kale, washed and chopped in 1-inch pieces 

  • Seasonings: generous pinch of salt, pepper, and a sprinkle of chicken bouillon


Instructions

  1. Set up a large frying pan on medium to high heat, and brown the bacon. Drain and set aside for later.

  2. Using a medium to large soup pot, put it on medium heat and brown the ground sausage. Scoop the sausage out of the pan, and set aside, draining.

  3. Saute the onions in the leftover sausage oil, for about 4 minutes or until cooked. Add in the minced garlic and heat for about 1 more minute.

  4. Add in the chicken stock and water and bring to a boil over high heat. Once boiling, add in the potatoes and bring the soup to a steady simmer over medium heat. Cook the potatoes for about 12-15 minutes, or until tender.

  5. Stir in the cooked sausage, the cream, seasonings, and kale, and simmer another 2 minutes or so. Careful not to boil it!

  6. Serve with a piece of bacon crumbled on top of bowl of soup. Mmmm!


After you make this yummy, filling (and gluten-free for me, yay!) comfort soup - be sure and comment how it turned out! Do you like it spicy or not so much? Can’t wait to hear what you and your family think!

Healthy Buttermilk Pancakes {Gluten-free}

On my quest to find more wholesome breakfast options, I came across this winner, and now my kids won't let me go too long without making these! 

TIP: They are great if you make a double batch, and stick a few away in a baggie in the freezer for quick school mornings. They re-heat easily in under a minute in the microwave, and my kids swear they taste just as good as the day I made them.

This recipe is originally from Ellie Krieger’s Cookbook, “The Food You Crave,” but I tweaked just a couple things. It is one of my absolute favorites, because it’s not obvious that it’s a healthier pancake.

These days, we replace the whole wheat flour/white flour combo with gluten-free for my special needs. Deliciously, though, the cakes are still fluffy thanks to the buttermilk!

Healthy Whole Wheat & Buttermilk Pancake Recipe

small ww pancake pic.jpg

How To Make It:

Ingredients:

•    3/4 cup whole wheat flour
•    1/2 cup all-purpose flour
(IMPORTANT - for our Gluten-free version, we replace these 2 flours with 1 1/4 cup Krusteaz Gluten-free flour!)
•    1 1/2 tsp baking powder
•    1/2 tsp baking soda
•    1/4 tsp salt
•    2 large eggs
•    1 cup lowfat buttermilk
•    3/4 cup almond milk
•    1 Tbsp honey
•    1/4 tsp vanilla extract
•    Cooking spray or olive oil

Instructions:

  1. Whisk together all the dry ingredients in a large bowl, then set aside. In a medium bowl, beat together the eggs, buttermilk, almond milk, honey, and vanilla.

  2. Place a nonstick skillet or griddle over medium heat, and spray the cooking spray lightly on the surface. Stir the wet ingredients into the dry ones, only long enough to mix them together. Batter may be slightly lumpy.

  3. Ladle the batter into the pan in small amounts, and wait for the cakes to form bubbles on top before flipping them. After about 1 1/2 minutes on each side, or until they are golden brown, remove the cakes from the griddle and serve.

 Tip: I keep it interesting for the kids by adding a tiny amount of mini chocolate chips or blueberries to the batter as the cakes cook up! The kids add protein by dressing the pancakes up with a tablespoon of peanut butter. Then they top them off with just a dollop of low-sugar syrup or a drizzle of pure maple syrup! 

Yummy, healthy, goodness for breakfast! 

Tell me what you think of these after you've made them...I can't wait to hear how they come out for you on our Facebook page!

Garlicky Green Beans with Almonds

How to Make Garlicky Green Beans with Almonds

(To skip my story and get right to the recipe, just scroll down!)

Growing up on a farm in the Midwest, smack in the middle of sweet corn and soybean country…

…we grew our own food, then canned and preserved it, from mom’s huge garden. One of her pride and joy crops was green beans - row after row of them. First seeded and tended in the brief Illinois summertime, then harvested in the Autumn. Then enjoyed as a healthy side dish, canned in rows and rows of mason jars in the cellar, all year long! They were especially appreciated as a warm veggie dish in the long, bitter northern Illinois winters.

I was young, very young, those days. But I knew hard work early in my life (and to this day, I’m still thankful for my strong work ethic built from those days.) Harvest was backbreaking work, plucking bean after bean from the plants - and even then, the work wasn’t over. Afterwards, we’d sit on the front porch, spread our skirted legs around a five gallon bucket full of beans, and snap, snap, snap until they were the perfect size to can later in a mason jar. First, you pop off the top stem, but make sure you don’t “waste the bean” then snap the body of the bean into 2 or 3 pieces. 

It felt like it took forever, but I would keep at it and work fast, so that there would still be time to climb the walnut tree in the back pasture or play with the newborn kittens up in the barn loft. Of course, that’s when the work truly began for my mom and older brother, as the canning process was too dangerous for us littles to be part of.

For the first couple years after we moved to the southwest desert, my mom bemoaned her loss of the garden and the food supply of FRESH, wholesome food. I understand this now, as an adult always on the search for wholesome food for my own offspring.

Nothing tastes as good as farm-grown veggies and I’ve truly never tasted the depth of that flavor since.

Now, when I’m craving a green bean dish, I get the organic ones from Costco as they come somewhat close to the ones I grew up on. They are affordable and crisp, FRESH.

That’s what I use in this recipe…

garlicky green beans 1.jpg

Ingredients

FRESH green beans (to make enough for each person eating, I grab a handful of beans per person!)
Sliced almonds (I just eye it, because we like a lot of almonds, but you could measure about palm size per 2 people)
5 cloves FRESH Garlic, minced
Unsalted Butter
Optional: 2 slices bacon, fried and crumbled
(leave off for vegetarian version)
Optional: 1 FRESH Lemon
(just to squeeze over it at the end of cooking if you’d like)

Instructions

  1. Take a stock pot, fill halfway or so with water. (Enough to cover the green beans once you add them in.) Bring water to boiling over high heat, add the green beans to it and a shake of table salt, and boil on medium to high heat for about 8-10 minutes or until cooked to your taste. (I like mine halfway crispy/soft!)

  2. Remove the green beans from water and drain in a strainer. Get a large frying pan ready.

  3. Place the frying pan over medium heat, and add in the unsalted Butter. Once it’s melted, add in the sliced almonds and garlic. Toast over the melted butter for about 90 seconds, then add in the beans.

  4. Toss the beans in the butter until just heated.

Add in the optional ingredients (bacon bits and lemon) at this point if you’re including them. Either way, this dish is so yummy!

I’d love to hear what you serve these beans with at your family dinner table - this is such a delicious way to make the old standby veggie - green beans!

garlicky green beans finished.jpg

Oven Roasted Brussel Sprouts

Ahhh, crispy, salty, crunchy oven-roasted brussel sprouts.

Ever enjoyed Brussel Sprouts crisped to perfection in the oven?

If not, you are missing out!

These yummy green vegetable jewels are far from the slimy or mushy steamed versions we grew up on. I previously steered clear of the little green “baby cabbages” until I found this delicious method. Now, I eat make all the time, and I’ve even convinced half my family to enjoy them with me. My hard-sell picky eaters are still a solid no thanks, though! But I think that has less to do with the way I make them and more that they are mini green things…

Here’s how to make this simple side dish:

broiled sprouts finished.jpg

Where to find them

You can find this nutrient-packed vegetable at any grocer. You’ll need about one handful sprouts for each person you’re feeding (that’s around 3-4 bulbs depending on the size.)

brussels at store.jpg

How to clean them up

Rinse them thoroughly in a big strainer, then remove any “blemished” outer leaves by simply plucking them off. If the outer leaves aren’t bad-looking, but they slip off while you’re prepping the sprouts, keep those to roast, too - they’ll become little “chips” as they get nice and crunchy!

Take a knife and chop off the hard ends (just the edge, don’t want to cut too far into the little head or it will fall a part.)

For this particular recipe, I then slice each head into 3 or 4 thin slices, long-wise. I’ve seen others just half them, OR quarter them into little wedges. Totally up to you and what kind of texture you’re looking for. The bigger the slice or wedge, the crunchier the sprout is.

how to oven roast them

Preheat your oven to 400 degrees.

Prepare a cookie sheet to use. I always put a sheet of aluminum foil over it for easy cleanup after. You could use parchment paper instead, if you’d like.

brussel+sprouts+cooked.jpg

Toss the brussel sprouts in a drizzle of olive oil, grind fresh salt and pepper over them, and spread them evenly on the baking sheet.

Bake for 12-15 minutes (but keep an eye on it for browning, every oven is different and cooks faster than others.) After the initial cooking, I increase the oven temp to 425 degrees and bake another 5 or so minutes to get them truly crispy. Another easy and quick way to crisp them is to broil on high for 2-3 minutes (But keep an eye on them! They’re too easy to burn with broil setting!)


another delicious way to make them…

For a different taste combination, you can make them the same way, but add in a couple slices of bacon (cut into small pieces) prior to baking. Then, a few minutes before they are done in the oven, open it up and and drizzle a bit of balsamic vinegar and maple syrup or honey (just couple tablespoons of each) over them, then toss them together and bake for a few more minutes.

2014-04-11+16.35.04.jpg

This is a completely different taste combo (bitter, savory and sweet) and really takes them up a notch!

2014-04-11 16.16.18.jpg

Well, that’s it friend! I want to know if this recipe helps you make brussel sprouts more often.

Tell me in the comments below or in our FRESH Start Club if this is a side dish you already love or will try!

Easy Slow Cooker Italian Chicken

Chicken in a slow cooker is always an easy way to have dinner simmering, ready to serve and sending wonderful aroma of comfort food - right when you walk in the house from the day! No mess, no fuss, just filling and delicious healthy dinner for your family tonight.

This recipe is designed to serve 4-6 people, but you can easily adjust the size by choosing less or more chicken amounts. (For example: Cut recipe in half if there’s only 2, double if you want to feed up to 8.)

slow cooker italian chicken.png

Here’s how to make it…

Ingredients

  • 4 chicken drumsticks + 4 thighs, skinless (if you purchase chicken with skin-on, just pull it off prior to putting in the slow cooker!)

  • 1/2 cup white wine (for a dry recipe, you can swap sherry wine vinegar or

  • 1 medium white or sweet onion, sliced in rings

  • 4 cloves garlic, mashed

  • 2-3 bay leaves, dried

  • 1-28 oz. can of crushed tomatoes, no added salt

  • 2-3 Thyme sprigs, leaves removed or 1/2 tsp dried thyme

  • 1 Tsp Oregano

  • 1 Tsp Garlic powder or granules

  • 1 Tsp Onion powder

  • Sea or Himalayan pink salt, cracked black pepper

  • Garnish with fresh basil and ground Parmesan if desired.


Instructions

  1. Put all ingredients in the slow cooker, pouring the tomatoes and wine over the chicken, then placing the onions and spices over all of it.

  2. Put the heat on low, and cook for 6 hours or so. Ready to serve!

  3. To keep it gluten-free, serve over veggie noodles - like spaghetti squash or zucchini noodles. If you enjoy pasta on occasion, try one of these healthier pasta options for a delicious and simple dinner! (One of the suggestions there is still gluten-free!)

Let us know what you think of this simple, but tasty recipe! We’d even love to see your personal pics of how it turned out on our Facebook page FRESH Start for Health!

ReFRESHing Chicken Salad Recipe

More energy per bite, in a low-calorie snack or no-cook main dish?

Yes, please!

This ReFRESHing Chicken Salad Recipe is easy to throw together using leftover roasted chicken (even from the store-bought type works) or shredded chicken from the slow cooker, instant pot or even good-old-fashioned stove-top cooked.

At my house, we serve it with gluten-free crackers and cucumber slices, wrapped up in a butter lettuce leaf like a green taco, or on a slice of Dave’s 12 Grain bread (for my non-gluten-free family members!)

Can’t wait to hear how you choose to enjoy this nutritious, easy snack or meal at your family’s table!

chicken+salad+recipe+pic+1.jpg

Here’s how to make our

ReFRESHing Chicken Salad Recipe

Ingredients

  • 1.5 to 2 cups chopped or diced cold chicken (shredded or roasted)

  • 1 stalk celery, finely diced

  • 1-2 green onion stalks, finely diced

  • half handful Pepitas (raw pumpkin seeds - we buy ours at the grocery store bulk section)

  • 1/4 cup dried cranberries

  • 1/4 apple, diced fine (choose a sweet apple if you like sweeter tasting salad, or a tart one if you like it more sour-tasting)

  • 2 Tbsp Greek Yogurt (or to your taste - can also use mayo if you prefer)

  • Sprinkle of each: FRESH cracked black pepper, Himalayan Sea Salt

  • Optional - to add a little heat, one sprinkle of cayenne or chili pepper

Instructions

Stir all ingredients together and either serve immediately, or you can refrigerate to serve later or take to a gathering.

This ReFRESHing salad makes a wonderful easy-grab lunch for the family’s busy days as well, as it can easily be made ahead of time and stored in the fridge for a few days, up to a week.

Nutritionally, it provides energy through the high protein, healthy fat and fiber combination of the ingredients, yet leaves you feeling light instead of over-full!

Grilled Chicken Thighs & Apricots

As the days grow warmer, we tend to migrate outdoors for family meal time in the southwest desert sunshine.  A favorite dinnertime plan around here, grilling is a "cool" way to keep family dinners “hot” (and keep the heat of cooking out of the kitchen!) 

This recipe is an easy way to sweeten up an old go-to: chicken thighs! Enjoy this Grilled Chicken Thighs & Apricots recipe with your own family as an everyday favorite, or wow your summer company with the visual appeal and taste of this superstar dish!

It looks like such a fancy dish, but actually only takes about 15-20 minutes to have ready. Easy and practical is how we do it here in the FRESH Start test kitchens!

Grilled Chicken Thighs & Apricots

Golden grilled chicken thighs with apricots.jpg

How To Make It

Ingredients

  • 1 lb boneless, skinless chicken thighs

  • 1/4 cup lower-sugar apricot jam (briskly stirred with 1/4 cup water to make nectar)

  • 1/4 cup snipped fresh mint (optional)

  • 1 Tbsp olive oil

  • 1 Tbsp apple cider

  • 1/2 tsp curry powder (optional)

  • 1 clove garlic, minced

  • 4 medium apricots, halved and pitted

  • 2 green onions, chopped

  • 1/2 cup chopped pistachios (optional)

  • 1/2 tsp dijon or yellow mustard

Instructions:

  1. Making the sauce: Combine half the nectar, half the mint, the olive oil, vinegar and curry and garlic in a bowl and whisk briskly together. Place the chicken thighs in a gallon-size plastic bag, and pour the mixture in the bowl over them. Seal bag, turn it to coat all the chicken, and refrigerate for 2-4 hours.

  2. Remove chicken from the bag and throw away the used marinade.

  3. Grill chicken on low-medium heat for about 12-15 minute or until no longer pink (180 degrees F on meat thermometer)

  4. Turn the thighs once midway through grilling.

  5. During the last 5 minutes of grilling the chicken, place the apricots on grill, flesh side down and grill until lightly browned and softened.

  6. For finishing sauce: combine the remaining half of the nectar in bowl with the green onions, pistachios, and mustard and whisk them all together. Drizzle over chicken and apricots right before serving.

NOTE: As with all our recipes, cutting costs and keeping it simple stay at the center - feel free to make this recipe without the pistachios, curry and any of the other higher-cost ingredients if necessary. It’s still a tasty and filling dish even if altered!

IMPORTANT: Our recipes are always portioned to serve around 4 people. Just double the ingredients if you’re feeding a larger family or cut them in half if it’s for 1-2 adults.

What do you think, does this recipe sound like a winner?

I would love to hear about your family's favorite grilling recipes and tips over on our community Facebook page FRESH Start for Health!