Bess Blanco

Healthy Cereal Cookies {Gluten-Free!}

Who doesn't love a FRESH new healthy cookie recipe, especially when it's actually got nutrition in it? My kids were so happy when I tested this recipe this past weekend (it's 100% my invention by the way!) and we were all happy when they actually turned out!

Now that gluten is a nemesis to my body's healing from an autoimmune disorder, I avoid it as much as I can...but that doesn't mean I love all things gluten-free - I can't stand how dense many things turn out with a lot of gluten free flours out there.

So this recipe uses a $5 gluten free flour from my neighborhood grocery, nothing too fancy. I bake so rarely now, it's worth the splurge! Try it and see what I mean. No rock-hard recipe here!

Ingredients

ingredients pic healthy cookies.jpg
  • 1 cup gluten-free flour

  • 1/2 cup ground flaxseed

  • 1 tsp baking soda

  • 1 tsp baking powder

  • 1/2 tsp salt

  • 1 tsp ground cinnamon

  • 1 stick butter, softened

  • 1/3 cup coconut oil

  • 1/3 cup white sugar

  • 1/3 cup brown sugar (or 2/3 cup brown sugar and no white)

  • 1/4 cup maple syrup

  • 2 eggs (we use cage-free, grain-fed)

  • 1 tsp pure vanilla extract

  • 4 scoops fruit and veggies powder (like the one pictured)

  • 2 cups bran cereal (fun sub: fruit n yogurt bran cereal!)

Instructions

prep for healthy cookies.jpg
  1. Pre-heat oven to 350 degrees. Place parchment paper on 2 cookie pans.

  2. Combine the dry ingredients (first 6 ingredients listed!) and stir together, then set aside.

  3. Mash the butter, coconut oil, and sugars and syrup together by hand, or use a handheld mixer for ease. Set this bowl aside.

  4. Whip the 2 eggs, adding in the vanilla extract. Add into the bowl with the sugars, butter and oil and stir all wet ingredients together well.

  5. On low speed with the hand mixer (or by hand) slowly add in the dry mixture to the wet ingredients bowl, a little at a time.

  6. Then slowly, add in the fruit and veggie powder and bran flakes until fully mixed.

  7. Drop a Tablespoon of dough on the trays, about 1.5 inches apart to allow for rising.

  8. Bake on 350 degrees for about 10 minutes, check the cookies, if they are browning on edges, they are done! Remove them from oven and let them sit on hot cookie pan for about 2-3 minutes.

  9. Move them to a cookie rack to finish cooling.

  10. Ready to enjoy! You can freeze extras for quick grab snacks for kid's lunches, after-school snack or part of an easy breakfast by serving them with a smoothie or banana!

cookies on rack 3.jpg

If you like, you can always add in nuts, dried fruit or mini-chocolate chips for extra fun or texture. You could also replace the coconut oil with peanut butter, and add in 1/2 cup mini chocolate chips to have a PB and choco snack!

These "cookies" contain enough healthy nutrients to be considered equal to a granola bar! Delicious, nutritious snacks! (This recipe is full of protein, fiber, omega 3 fatty acids, vitamins and minerals...mmmm!)

After you try them, pop back over here and tell us what you think!

Bet your kids/family won't even know they are eating such a great blend of nutrition!

Mango & Chicken Napa Salad

Light dinner-making just got easier than ever, with this toss-and-go Mango and Chicken Napa Salad recipe! Your family will enjoy this one-bowl meal that is packed with fiber, lean protein, and delicious healthy fats! The flavor is unique and light, creating a tasty dish your loves will ask for again!

Bring it to your next gathering as a healthy, lean addition to the table!

mango chicken napa salad pic 2.jpg

Ingredients:

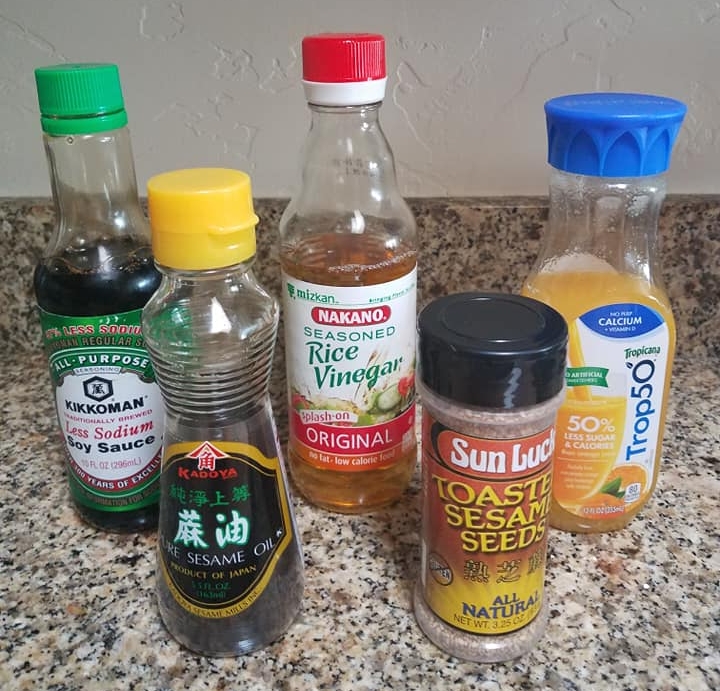
  • 1/3 cup low sugar orange juice

  • 3 tablespoons rice vinegar

  • 3 tablespoons low sodium soy sauce

  • 1 tbsp sesame oil

  • One head napa cabbage, sliced thinly

  • 2 cups sugar snap peas, sliced thinly and diagonally

  • 2 cups shredded chicken or diced grilled chicken

  • 1 medium mango, sliced

  • One handful coarsely chopped fresh mint

  • One small bunch of green onions, sliced diagonally

  • 2 tablespoons toasted sesame seeds

Instructions:

To make the dressing: whisk together the juice, vinegar, soy sauce, sesame oil and half of the sesame seeds in a small bowl. Set aside.

mango chicken napa salad pic 8.jpg

To make the salad: thinly slice up the napa cabbage and peas, toss together with the chicken, mango, mint and green onions. About 30 minutes to an hour before serving, toss everything together and then refrigerate so that the marinade can flavor the salad ingredients. Sprinkle the rest of the sesame seeds over the recipe right before serving.

mango chicken napa salad pic 7.jpg

Tips:

For the chicken in this recipe, you can either use grilled chicken leftover from a previous meal, or shredded cooked chicken made easily in a slow cooker.

If you like a little heat, you can always add crushed red pepper into this recipe, or even a little bit of curry paste into the dressing.

To save even more time and effort, you can always replace the Napa cabbage and sugar peas with a pre-chopped cabbage salad mixture in a store-bought kit! Toss in shredded bits of a store-bought roasted chicken and voila! You're eating dinner - EASILY!

This recipe was found originally in the Eating Well magazine, and tweaked to be FRESH Start friendly...we'd love to hear what YOU think of it! 

Healthy Turkey Quinoa Mini Meatloaves

Family dinners can be an exhausting process for the busy mom who is trying to please all the varied preferences and taste buds in her home! 

One of our greatest goals here at FRESH Start is providing the busiest mom and their pickiest eaters with more family-favorites – more TASTY, HEALTHY recipes to make her life easier!

My picky family of six loves this recipe – in fact, it’s a regular at our dinner table! 

mini meatloaves.jpg

It’s veggies, protein, healthy fats and whole grains all in one beautiful dish.

Makes a fabulous prep-ahead dish, too. 

Just make a few extra loaves ahead of time (I do this easily by doubling the batch I'm making for dinner) then, instead of cooking them, I freeze them ready to pop in the oven on the night in question. You can freeze them right in their mini-loaf pans, leaving no cleanup on the night you fix them! Plus you'll have a hearty, no-work dinner ready to go for one of your family's busiest nights.

Here's how to make them:

Ingredients

  • 1 lb or 1 package lean ground turkey (93/7)

  • 3/4 cup cooked quinoa

  • 1 egg

  • 1/4-1/2 cup sweet onion, finely diced

  • 3-4 baby bell (Portobello) mushrooms, finely diced

  • 2-3 garlic cloves, finely diced

  • 1/3 cup carrots, finely diced

  • 1 tsp dried thyme

  • 1/2 tsp cumin

  • Olive oil

  • 2-3 cheese sticks (mozzarella) cut in half or thirds

Topping sauce:

1/3 cup apple cider vinegar

1/3 cup low-sugar ketchup

1 Tbsp brown sugar or honey

Add 1 tsp of water at a time to get sauce to desired thickness. Stir all sauce ingredients together with a whisk until smoothly blended!

Instructions

  1. Preheat oven to 375 degrees, prepare 4-5 mini-meatloaf pans by spraying them with olive oil spray.

  2. Put a medium sauté pan over medium heat, add 1 tsp olive oil to pan. Add in the diced onion, mushroom, garlic cloves and carrots. Sauté for about 2-3 minutes, or until veggies are softened and smell savory.

  3. Add in the thyme and cumin. Salt and pepper to taste. Pull pan off stove, allow mixture to cool for a few minutes.

  4. Meanwhile, in a large bowl, mix together the ground turkey, quinoa, and egg. Once vegetable and spice mixture is cool, add that into meat mixture.

  5. Pat meat mixture into 4-6 small loaves, placing them into mini loaf pans. Put 1/2 of a cheese stick in the middle of each loaf, then form meat around cheese stick.

  6. Using your fingers, pat an indent into top of each loaf, and place 1-2 Tbsp of topping sauce into the well.

  7. Bake loaves at 375 degrees for about 20-25 minutes, uncovered, or until cooked through.

    Serve with baked sweet potatoes and a side salad or other green selection for a well-rounded dinner selection!


Flexible enough to make ahead of time, or right on-the-spot, this family favorite is sure to become a go-to at your place as well!  Super-healthy, and tasty to boot, you’ll be glad you added this one to your family recipe rolodex!

Let us know what you think of this recipe, we’d love to hear your family’s feedback!  

Asian Chicken Lettuce Wraps {Just Like the Restaurants!}

Hubby and I are cheap-skates when we go out to eat ... we're always on the lookout for deals and steals for our date nights! So we were thrilled when we discovered happy hour for appetizers and small plates at a local restaurant (with food we actually enjoyed!) ... and even more ecstatic when I figured out how to duplicate this dripping-with-flavor dish at home!

A few alterations later, we created this beautiful dish...

Asian Chicken Lettuce Wraps

asian chicken lettuce wraps 1.jpg

Here's how to make it!

Ingredients:

  • 3/4 cup teriyaki sauce (make homemade or use low-sodium version)

  • 1/3 cup sweet chili sauce (Mae Ploy is our fave choice!)

  • 1/4 cup low-sodium soy sauce

  • 1 Tbsp fresh ginger, peeled & finely grated or minced

  • 1 1/2 lbs ground chicken (I use the mild Italian one in grocery store - you can also use ground turkey)

  • 1/2 cup green onion, diced

  • 2 cloves fresh garlic, finely minced

  • 1 can water chestnuts, drained and finely minced

  • 1/2 cup pine nuts (optional)

  • 1/2 block firm tofu, drained & briefly seared, then diced into small pieces

  • 1/2 cup fresh Baby Bella mushrooms, roughly diced

  • 1 head living or butter lettuce

Garnish:

  • Shredded purple cabbage

  • Diced green onions

  • Shredded fresh organic carrots


Instructions:

  1. Combine first 4 ingredients in bowl, whisk together and set to the side.

  2. In a large, deep, skillet over medium heat, brown ground chicken in tsp oil. Once chicken is cooked, remove from pan and drain. Set aside for now.

  3. Using the same skillet, heat 2 Tbsp oil over medium-high heat. Add the onion, garlic, water chestnuts, pine nuts, tofu and mushrooms together and saute for about 2 minutes.

  4. Add the chicken back in, and pour ½ the sauce mixture over the meat and vegetables. Cook all of it together, uncovered, for about 3 or 4 minutes.

  5. Serve the mixture in the “lettuce cups” and garnish with the shredded fresh veggies.

  6. Use the remainder of the sauce as a dipping sauce,  or to drizzle to taste over the lettuce cups!


What about you friend? What restaurant favorite have you enjoyed and then tweaked in your own kitchen at home? Tell us about it HERE, and maybe we'll feature it (and YOU!) on this blog! 
 

This recipe was originally found on Favorite Family Recipes (www.favfamilyrecipes.com) and changed in a few ways to reflect the FRESH Start-style!

Jicama Slaw

Looking for a healthy side dish for that next gathering (to replace a maybe-not-so-healthy-choice!) or just to add as a filling and tasty side dish to your grilled chicken or fish? 

This beautiful, super-easy side salad is a perfect pairing to any FRESH entree! Try it and then tell us it's not your new favorite!

jicama slaw.jpg

Here's how to make this easy side dish:

Ingredients:

  • 1 Medium Jicama Root, grated with a cheese grater

  • 1/2 finely diced orange, yellow or red bell pepper (or you can use mini-sweet bells, too!)

  • 1/2 de-seeded cucumber, diced finely

  • 1/4 red onion, finely diced (less if it's a strong one! You don't want the flavor to overtake the slaw!)

  • Handful FRESH Cilantro, minced lightly with sharp knife (so as not to bruise it!)

  • 1/2 to 1 large lime, squeezing the juice directly into slaw mixture (to taste)

  • 2/3 of small can of Mandarin Orange Slices, diced (add just 1-2 Tbsp of the juice, but not all of it!)

Instructions:

Stir all the ingredients together, adding or tweaking anything you'd like to your unique taste (such as 1/2 fresh jalapeno, diced, for heat.) 

Refrigerate mixture for about 1-2 hours then stir thoroughly again and serve!

Enjoy as a FRESH and healthy side dish that everyone loves! At potlucks and gatherings around our house, this dish gets wiped clean!

Easy Beef and Broccoli Recipe {How To}

When the "takeout craving" for beef and broccoli hits, what to do, healthy eaters?

In my house? We make this easy, 15 minute one-pot dinner recipe - Easy Beef and Broccoli. It has quickly become a fast family favorite! Since it's made of ready-to-grab pantry ingredients, it's enjoyed often around here.

beef and broccoli final.jpg

Today I'm sharing the version I have adapted for my family's tastes from one of my fave food bloggers, Chungah of damndelicious.net. (Check out her blog for more FRESH recipes using whole ingredients!)

Here's the recipe:

Ingredients

  • 2/3 cup reduced sodium soy sauce
  • 1/2 cup low-sodium chicken broth
  • 1/4 cup honey
  • 2 tablespoons rice wine vinegar
  • 3 cloves garlic, minced
  • 1 tablespoon sesame oil
  • 1 tablespoon cornstarch (optional - depends on how thick you want your sauce)
  • 1 teaspoon hot sauce, to taste
  • 1 teaspoon fresh grated ginger root
  • 1/4 teaspoon red pepper flakes
  • 1 pound lean steak, thinly sliced 
  • 2 head broccoli, cut into florets

Instructions

Stir together soy sauce, chicken broth, honey, vinegar, garlic, sesame oil, cornstarch, hot sauce, ginger, red pepper flakes and 1/4 cup water and place to the side.

beef and broccoli how to 1.jpg

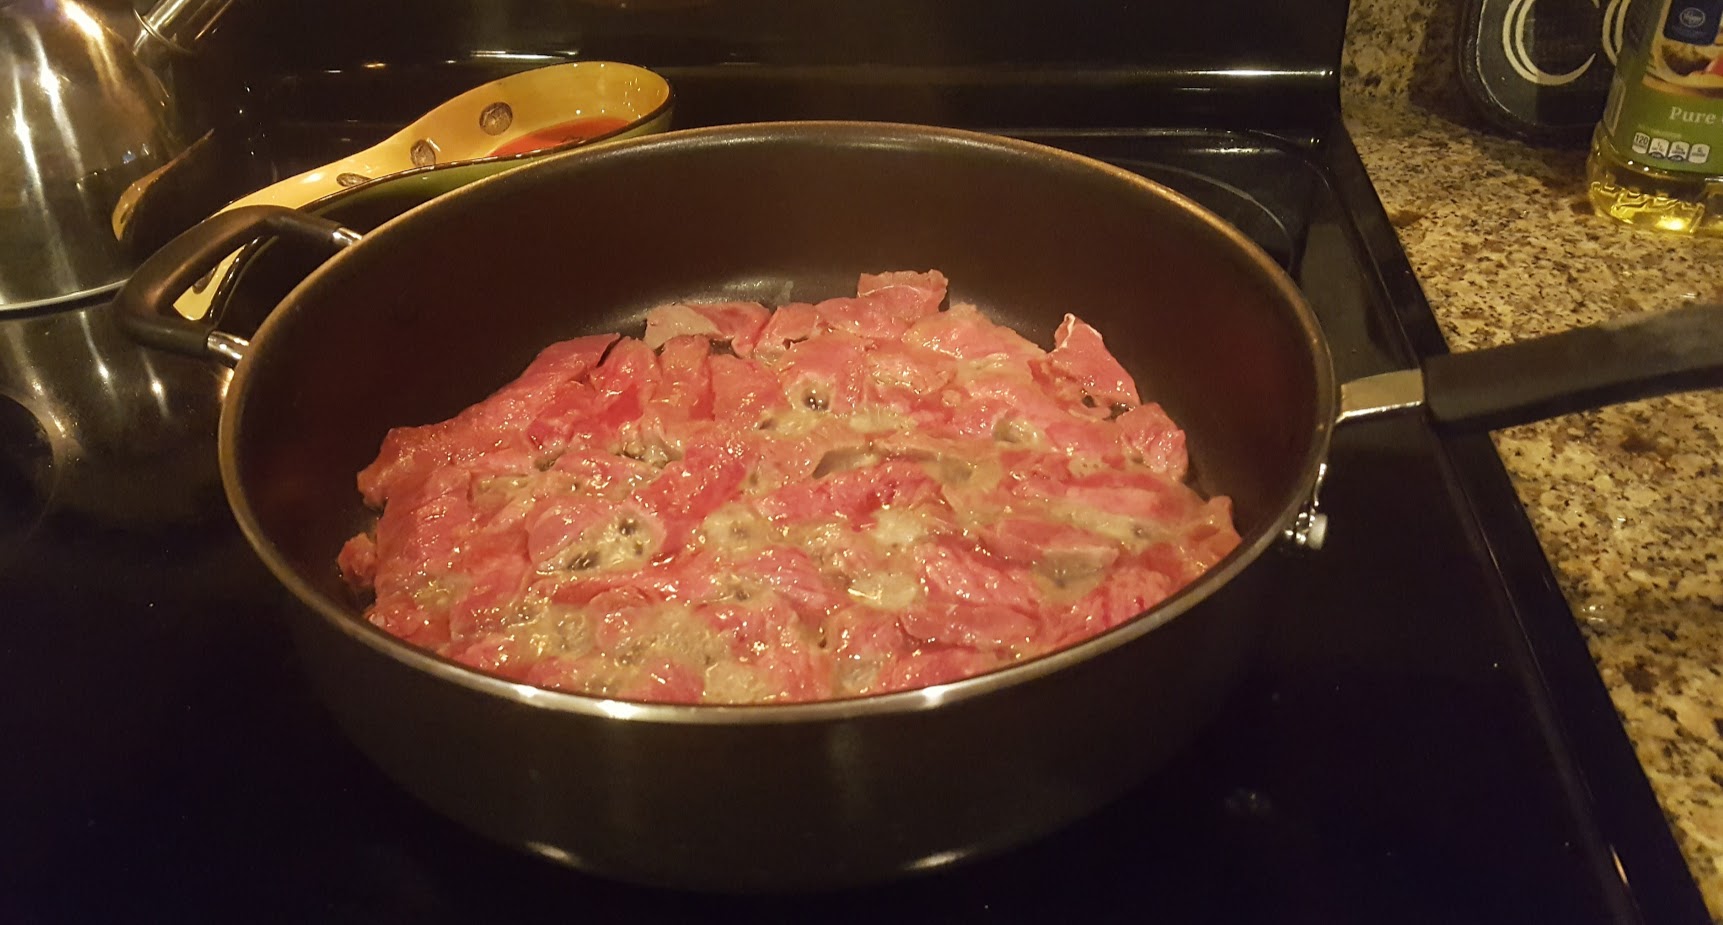
Start a large non-stick skillet over medium high heat. Add the steak slices and cook, flipping once, until browned, about one minute on each side. It's ok if meat is still pink, it will be tender and cook to perfection later on.

beef and broccoli how to 3.jpg

Stir in broccoli florets and sauce mixture and cook until tender and sauce is slightly thickened, about 3-4 more minutes. Serve immediately over brown rice or rice noodles.

beef and broccoli how to 2.jpg

Note: You can easily turn this recipe vegetarian by using tofu or nuts in place of the beef. I make it with "toasted tofu" for my hubby and he loves it!

How do you make YOUR Beef and Broccoli? Have you ever tried cooking it at home? Tell us your fave way to enjoy this popular dish in the comments below!

How to Make Homemade Hummus {That everyone LOVES!}

Ahhhh hummus.

Most people either love it or do NOT (it's a strong taste and not for everyone, for sure!) 

But for those of us who DO, I'm sharing my awesome (and EASY!) recipe with you right here. If you want to save money and taste a better batch of hummus (homemade really is the BEST!) then read - or watch - on as I share with you

How to Make Homemade Hummus {that everybody loves!}

Hummus can get expensive when you're buying it in a convenient ready-to-go container at the store, but can be a great backup option. No judgy-judgy for store bought hummus here! You'll even occasionally find some in my fridge! If you're ready to taste a fresh hummus that is far and above the store bought version, here you go...

How to Make It

Pretty easy, right? Tahini is the "hummusy" ingredient that turns a grainy ground chickpea mix into a silky smooth hummus dip. It's quite expensive (around $8 a jar) but that one jar will last you through DOZENS of batches of hummus, so in the long run, it's much cheaper still to make this homemade than to pay $3-$5 per batch at the store.

and here's the recipe:

Ingredients:

  • 1 can chickpeas (or garbanzo beans) rinsed and thoroughly scrubbed with hands to remove the loose hulls

  • 2 cloves of fresh garlic (less or more to taste)

  • 1/2 fresh lemon, squeezed

  • 1 tsp (or more to taste) tahini paste

  • Drizzle of olive oil

  • sprinkle of salt

Instructions:

Put all of this PLUS a tiny amount of water (start with 1/4 cup and then slowly add more until you get desired consistency) into your blender or food processor (I use my Nutribullet!) and blend, then scrape, then blend, then scrape until you get the desired "feel" of your hummus!

You can serve immediately, or store the hummus in the fridge for up to a week!

We enjoy our hummus with toasted Naan bread, or raw cucumber and bell pepper slices, or our Gluten-free seed crackers. It also makes a GREAT "spread" for wraps and sandwiches!

How to Make Cha Cha Cha Chiata! {Or Chia Pudding, FRESH Start style!}

So I have to confess...

I really thought all the hoopla about Chia Seeds was maybe just another "health food fad" ... but then I kept reading about the energy that people were getting from this miracle seed! And since that was something I so desperately needed to increase in my life, I decided to give this tiny little seed a chance in my diet! Oh boy, am I glad I did!

Energy increase, anyone?

Yes, Chia Seeds increase your energy, and I'm living proof!

But don't ask me, let's look at the long-time use of this miracle seed in other cultures to see how it works!

  • Chia seeds grow natively in South America, since as early as 3500 B.C.

  • They were eaten by the Aztecs and Mayans and used as energy-sources for them, as well as a property of some medicines!

  • Modern day chia seeds are now grown in other parts of the world, including US and Australia!

  • Only 2 Tablespoons of chia seeds produces 11 grams of fiber, 4 grams of protein and 9 grams of healthy fat!

  • This same amount also gives your body 30% of it's necessary magnesium and manganese (2 minerals we're often deficient in!)

  • 2 Tbsp of these seeds also delivers 18% of your body's daily need for calcium!

Have I convinced you of the powerhouse these little seeds are?

I was convinced! Now to try them for myself...

I wanted to use chia seeds simply - but found that putting them in my smoothie BEFORE blending just created a texture to the whole smoothie that I was not loving! (I'm texture sensitive, so that's a big deal to me! Anyone know what I mean?) So now, sometimes I add into the smoothie AFTER I've blended it up!

My favorite way to get my daily Chia Seeds though, is by making Chia pudding (or in our case, Cha Cha Cha Chiata!)

I've seen plenty of recipes for Chia Pudding, but again, because of my "texture sensitivities" I found that I didn't really enjoy it made  that thick. So I've created one I absolutely love and look forward to "drinking" as a powerful addition to my energy-meals daily!

{We call it "Chiata" because my Latino hubby says this drink reminds him of his "horchata," a popular drink in his culture! Only this "chata" has chia - hence the new name CHIATA!}

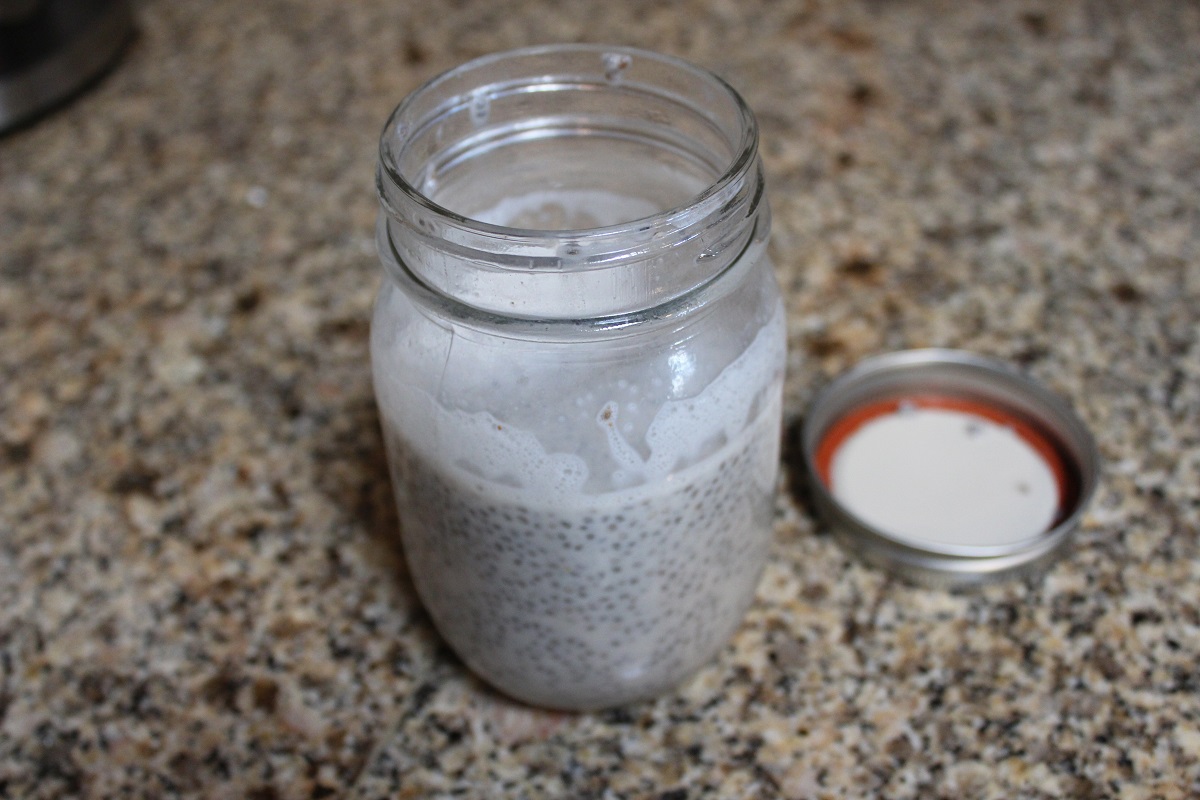
jar of chiata.jpg

Here's how to make it FRESH Start style!

Cha Cha Cha Chiata

Ingredients:

  • 1 cup chilled almond or coconut milk (or any other unsweetened plant-based milk)

  • 1.5 to 2 Tbsp Chia Seeds (if you want thicker consistency, add a little more)

  • 1/4 tsp pure vanilla extract (or just eye it and drizzle)

  • 1/2 tsp pure maple syrup (try it first without and only add if you need extra sweetness)

  • quick shake of ground cinnamon

Instructions:

  1. Using a small mason jar, shake all ingredients together for a minute or two. Then place in fridge and enjoy within a few minutes or hours later.

  2. The chia seeds will swell up, absorbing the liquid and become easily ingested either by using a spoon or drinking straight from the jar.

I dare you to replace one of your current choices for energy drink in the morning or afternoon with this delicious chiata from ingredients you can find anywhere! You'll never miss the ups and downs of the other drink, but will truly enjoy the steady, ongoing energy you get from this drink!

Did you like this recipe? Get plenty more right here!

Then let us know how YOU make YOUR Chiata in the comments below!

Easy Oven-Baked Chicken Thighs and Rice

In our seemingly-endless search for gluten-free options for one very picky eater in my home, I have resorted to super basic dinners these days. 

So I was excited to create this easy recipe to add into the family recipe round-up:

easy oven-baked chicken thighs with my homemade rub, and served beside brown rice steamed up in low-sodium chicken broth...

quick, affordable and the whole family enjoyed them!

Several of us also had a luscious green salad taking up the other half of the plate (not pictured) ... but I can only get my super picky eater to eat a salad about once or twice a week. (True confessions of a health coach!) This is why we add smoothies into her breakfast routine as often as possible - to get those fresh fruits and veggies into her body that way.

oven baked chicken thighs branded.jpg

Back to dinner - so here's how to make this simple fare...

Ingredients:

  • 8 chicken thighs, skin on (you can pull it off after cooking and the meat will still have the flavor from the rub and juices)

  • TO MAKE THE RUB - stir together 2 Tbsp garlic powder, 2 Tbsp onion powder, 2 Tbsp paprika, 1 tsp chili powder, sprinkle of cumin, sprinkle of crushed red pepper, 1/2 tsp salt, fresh grated black pepper

  • 1 cup brown rice

  • 2 cups low-sodium chicken broth

Instructions:

Preheat your oven to 425 degrees.

MEANWHILE FOR RICE: Place rice and broth in a rice cooker and cook until fluffy and done. OR if you don't have a rice-cooker - place broth in a medium saucepan over medium to high heat, and allow to begin boiling. Add rice, then turn the heat to low-medium, simmering the rice, covered, for about 30-40 minutes. Fluff with a fork, remove from heat, and keep covered.

MEANWHILE FOR THE CHICKEN: Place aluminum foil over a cookie pan, and pat the chicken thighs dry, then place on pan. 

Sprinkle the dry rub generously on the thighs.

Place in oven, uncovered, and bake for 25-30 minutes or until internal temperature of chicken is 180 degrees with a meat thermometer.

Remove the chicken from the pan with tongs and place on a paper towel to drain. Serve with the rice and a vegetable or green salad on the side.

How to Cook Quinoa + Recipes

HAVE YOU HEARD ABOUT THIS NEWEST POWER-GRAIN ON THE MARKET YET?

I had heard of quinoa (pronounced KEEN-WAA) in all the "health food" circles, but had never tried it for myself.  Now, though, I've tried it several different ways, and I LOVE the simplicity of this grain, the numerous and incredible benefits all packed into one tiny seed, and the variety I can use in preparing it! 

Turns out, this tasty super food isn't new at all, as it was enjoyed by the Incas in ancient times, and other native South Americans, where they dubbed it the "mother of all grains!"

One of the reasons I held off in trying quinoa was because of all the fuss in the foodie circles about the "high cost" of it compared to rice and other more common household grains.  I've got a solution for that, too!  With some careful planning and watching, I get quinoa at the neighborhood health food markets for as little as $3 a pound.  You just have to watch for it to go on sale and buy more of it then.  It is usually cheaper sold in bulk, instead of prepackaged.

(Update: Costco is a great place to get it at a lower price in bulk as well!)

HERE'S HOW TO MAKE IT:

Prepare quinoa by boiling 1/2 cup of the grains with 3/4 to 1 cup of water or broth (for extra flavor!)  It only takes about 12 minutes, with the pot covered, and at a soft boil, for the grain to be completely cooked. 

It stays a wonderful slightly crunchy-chewy consistency for even up to a few days after cooking!  I try to cook enough for another meal or two after the first one where I serve it fresh.  It is so tasty leftover, added to a fresh salad as a protein-rich topper.  (One of the top benefits of this grain is the high amount of lean protein found in it - 8 grams in a cup of it!)

Here are two ideas for quinoa recipes you can try for your own family:

ORANGE & ALMOND QUINOA RECIPE

orange & almond quinoa edited.jpg

Ingredients

1 cup cooked quinoa
1 fresh orange (peeled, separated into bite size sections)
handful toasted, sliced almonds
1/4 tsp salt
1/4 tsp ground pepper
 1/2 cup fresh-squeezed orange juice
garnish - sliced green onions

Instructions

Cook quinoa and fluff. Add almonds, orange sections, salt & pepper. Toss together. Squeeze 1/4 cup fresh orange juice over and toss again to coat.

CILANTRO LEMON QUINOA RECIPE

Ingredients

1 cup cooked quinoa
1/2 fresh lemon
handful toasted pine nuts
1/4 - 1/2 cup chopped cilantro

Instructions

Cook quinoa and fluff. Squeeze lemon juice over grain, and stir in pine nuts and cilantro. Toss together with sprinkling of salt and pepper to taste.

These dishes make a wonderful side to fish, chicken or as a vegetarian main dish with steamed or sauteed vegetables on the side.

HERE ARE A FEW MORE RECIPES WE THINK YOU MIGHT ENJOY:

One-Pot Summer Salmon Dinner

Asian-Inspired Grilled Chicken Thighs

Mediterranean Chicken Salad

Quinoa makes such a great part of a healthy (and easy!) dinner meal plan for the week, so use this make-ahead recipe often as a great grain for family meals. To help you create the meal plan a little easier, download these totally free printables from us! Let us know what's on your meal plan this week in the comments below.

Honey Garlic Chicken & Veggies in a Crock Pot

There's definitely a trend happening around my kitchen these days - I am looking for easy, delicious, FRESH meals that can be made in ONE POT or all together in the Crock Pot! This way, it's less mess and fills up the hungry tummies around here AND does it with plenty of nutritious foods!

Here is another one-dish dinner to make eating FRESH easier!

Seriously you guys, when you know you're feeding your family "right" and yet you do it in ONE POT, with only a few minutes of prep and a few dollars of ingredients - it's a busy-mom win! Who's with me? 

Here's how to make this simple dish the whole family will love.

Ingredients:

  • 8 bone-in chicken thighs (can remove skin or cook with it on for flavor and then remove before eating)
  • 1 lb baby red potatoes, halved or quartered
  • 1 lb organic carrots, peeled and quartered
  • 1 lb organic green beans, trimmed

    For the sauce:
  • 1/2 cup low sodium soy sauce or Bragg's Aminos 
  • 1/3 cup honey
  • 1/4 cup ketchup (I buy the low-sugar variety)
  • 4 cloves garlic, minced
  • 1/2 tsp dried oregano
  • sprinkle crushed red pepper (if you like a little heat)
  • fresh ground black pepper

Instructions:

  1. Whip together all the sauce ingredients, and set aside.
  2. Place the chicken thighs into the crock pot, set it to high heat (to be done in 3-4 hours) or low heat (to be done 7-8 hours)
  3. Lay the potatoes and carrots on top and around the chicken. Drizzle the sauce over all of it.
  4. Cover and leave it be for desired time. Remove lid and spoon the juice inside the crock pot over the top of chicken and veggies a couple of times during cooking.
  5. In last 30 minutes of cooking, add the green beans in. Baste the whole dish.
  6. Serve immediately with chopped fresh parsley over the top, if you like.
Honey Garlic Crock Pot Chicken MAINpic.jpg

If you prefer the chicken skin on, try this delicious trick - put the oven on broil, place the thighs and some of the veggies on a cookie tray, and broil for about 3 minutes, until the skin is crisp and the sauce is caramelized!

Tell us what you think in the comments below - is this a good recipe to try to round out your easy FRESH meal plan at home?

This recipe was originally found on one of our FAVE blogs for FRESH eating - http://damndelicious.net/. It has been "remodeled" a bit, as we like to cut down on sugar and sodium as much as possible in cooking for our family and testing recipes out for YOU! 

Healthy One Pot Stroganoff

Growing up in sweet corn farm country in the Midwest, you know comfort food dinners were a regular event in my childhood farmhouse kitchen. These days, even though my family and I live in the desert southwest, they are still a favorite way to show my love through my cooking to my family. And...

...One pot dinners made healthy? Even better!

When I found this could-be Healthy One Pot Stroganoff recipe, I just knew I had to re-make it, FRESH Start-style! (Whole foods, lean meat, healthier "sauce") It is getting easier to do that these days - after a few years of "cleaning up" favorite recipes to be healthier you just get quicker at making ingredient switches and change-ups.

finished better.jpg

So here is my Healthy One Pot Stroganoff recipe - betcha won't even miss the other stuff once you've tried it! 

Ingredients:

  • 2 cups fresh mushrooms, sliced (we use Baby Bella)
  • 1/2 sweet onion, diced
  • 3 cloves fresh garlic, minced
  • 1 lb thin sliced steak (we use sirloin or another lean choice)
  • 2 tsp paprika
  • 4 cups beef broth (low-sodium)
  • 8 oz whole wheat or gluten-free egg noodles
  • 1/2 cup greek yogurt, plain (or sour cream)
  • fresh parsley for garnish
  • sea salt and fresh ground pepper to taste

Instructions:

  1. In a large pot or deep pan, heat stove to medium-high and drizzle olive oil in bottom of pan. 
  2. Once oil is heated, add steak slices to pan for about 2 minutes. 
  3. After the steak has browned on one side, turn them over. (Should only be about 2 minutes tops!) Add mushrooms and onions into pan with the steak slices, and cook until mushrooms brown and onions are translucent. 
  4. Stir in paprika, beef stock and noodles and bring pan to boil. Then cover pan, bring heat down to medium and simmer for 12-15 minutes (for al dente noodles, may be less time.)
  5. Lower the heat to warm and stir in greek yogurt or sour cream, then turn off heat and let pan sit for a few minutes, covered.
  6. Sprinkle parsley over dish and serve.

Too easy, right? Comfort food for dinner in under 30 minutes, prepared in only One Pot, and with so much nutrition in it, too! What is your favorite one-pot comfort food dinner? We'd love to hear your FRESH idea in the comments below!